A zero-waste kitchen with kids isn’t about perfection or buying new things; it’s about adopting simple efficiency systems that reduce waste, save money, and lower your daily stress.
- Focus on high-impact areas like the kitchen first, where over 40% of household waste originates.
- Use practical strategies like meal batching and a “container audit” to save time and use what you already own.
Recommendation: Start with one change, like tackling food waste, and build momentum from there. Progress is the goal, not a flawless, Instagram-worthy pantry.
The idea of a zero-waste kitchen can feel like just another item on an already impossible to-do list for busy parents. We see the overflowing trash can and feel a pang of guilt, but then we see images of perfectly organized pantries with matching glass jars and it feels completely unattainable. The common advice—buy in bulk, compost everything, make all your own snacks—often sounds like more work, more expense, and more potential for kid-related failure.
Many of us have tried. We buy the fancy reusable wraps only to find them waxy and difficult to clean. We buy a 10-pound bag of potatoes to “save money” only to throw half of them out when they sprout. This cycle can leave you feeling that reducing waste is a luxury for people with more time and fewer picky eaters. It reinforces the idea that sustainability is at odds with the reality of family life.
But what if the real key to a low-waste kitchen wasn’t about adding more chores, but about creating simple, efficient systems? What if it could actually reduce your mental load and save you significant money? This guide is for you. It’s not about achieving zero-waste perfection overnight. It’s about making smart, strategic changes that fit into your real, chaotic, and wonderful family life, starting with the highest-impact area: your kitchen.
This article will walk you through a realistic, step-by-step approach. We’ll explore why food waste costs you so much, how to pack lunches kids will actually eat, and how to avoid common consumer traps. Let’s get started on a path that values progress over perfection.
Table of Contents: Your Roadmap to a Low-Waste Family Kitchen
- Why Does the Average Family Throw Away $1,500 of Food Annually?
- How to Pack a Zero-Waste School Lunch That Kids Will Actually Eat?
- Beeswax Wraps vs. Silicone Lids: Which Reusable Lasts Longer?
- The Mason Jar Trap: Buying New Containers Instead of Using What You Have
- When to Tackle the Bathroom: Why You Should Start With the Kitchen First?
- How to Calculate Unit Price Correctly to Avoid “Bulk Illusion” Deals?
- The “Batching” Method: Why Doing Laundry Once a Week Is Faster Than Daily Loads?
- Why Repairing Electronics Is Cheaper Than Replacing Them in a Circular Economy?
Why Does the Average Family Throw Away $1,500 of Food Annually?
The number in the title is actually an understatement. The financial drain of food waste is often the most shocking realization for families starting this journey. While the $1,500 figure is widely cited, more recent EPA data reveals that families waste up to $2,913 per year. That’s money that could go toward family vacations, savings, or just easing the monthly budget pressure. This waste happens for relatable reasons: we buy too much, our plans change, or produce goes bad before we can use it.
This isn’t just about losing money; it’s about losing resources. However, you can reclaim a surprising amount of that value by shifting your mindset from “scraps” to “ingredients.” This is a core principle of an efficient, low-waste kitchen. It’s not about deprivation; it’s about resourcefulness.
Case Study: Recovering Value from Food Scraps
The Zero Waste Chef blog provides a perfect example of this in action. By saving vegetable peels, onion skins, and herb stems, you can create a rich, flavorful broth for free, replacing store-bought versions that cost $3-5 per quart. Citrus peels can be infused in vinegar to create an effective, all-purpose cleaner, saving another $4 per bottle. Even stale bread can be blitzed into breadcrumbs or toasted for croutons, saving $3 a package. As the Zero Waste Chef demonstrates, implementing just these few strategies can help a family recoup 15-20% of their food waste costs. It transforms waste from a financial loss into a tangible kitchen asset.
Thinking this way turns off the “autopilot” of throwing things away. Before you toss that broccoli stalk, you start asking, “What else could this be?” This single question is the foundation for a more sustainable and economically savvy kitchen.
How to Pack a Zero-Waste School Lunch That Kids Will Actually Eat?
The school lunchbox is a major source of single-use waste, from plastic baggies and juice boxes to pre-packaged snacks. The goal is to eliminate this waste without packing a lunch that comes back uneaten. The secret isn’t just in the container, but in the presentation and the involvement. Kids are far more likely to eat a lunch they helped prepare or that looks appealing.
Deconstructed lunches are a parent’s best friend. Instead of a sandwich that might get soggy, think of a bento-style box with separate components: whole-wheat crackers, cheese cubes, sliced turkey, cucumber coins, a handful of berries, and a small container of hummus. This “snack-style” meal appeals to kids’ grazing habits and gives them a sense of control. It also makes it easy to use leftovers from last night’s dinner, like cut-up chicken or pasta salad.
Choosing the right container system is crucial for success. It needs to be easy for your child to open and close, durable enough to withstand being tossed around in a backpack, and easy for you to clean. The ideal choice often depends on your child’s age and the types of food you pack.
| Age Group | Best Container Type | Number of Compartments | Key Features | Average Cost |
|---|---|---|---|---|
| Preschool (3-5) | Plastic bento with easy latches | 4-5 small | Lightweight, picture guides, leak-proof | $25-30 |
| Elementary (6-10) | Stainless steel with dividers | 3-4 medium | Durable, dishwasher-safe, customizable | $35-45 |
| Middle School (11-14) | Modular containers | 2-3 large | Stackable, microwave-safe inserts, adult-like design | $40-50 |
Investing in a good system like the ones detailed in this Good Housekeeping guide to bento boxes might seem expensive upfront, but it pays for itself quickly when you’re no longer buying disposable bags, containers, and individually wrapped snacks.
Beeswax Wraps vs. Silicone Lids: Which Reusable Lasts Longer?
When replacing plastic wrap, two popular options emerge: beeswax wraps and stretchy silicone lids. They both serve a similar purpose but have vastly different profiles in terms of durability, maintenance, and kid-friendliness. Understanding the “true cost” of each—factoring in lifespan and ease of use—is essential for a busy family.
Beeswax wraps are pliable, breathable cloths coated in beeswax, resin, and oil. You use the warmth of your hands to mold them over bowls or wrap them around food like cheese or half an avocado. They are compostable at the end of their life. Silicone lids are stretchy, dishwasher-safe covers that create an airtight seal on bowls and containers. They are incredibly durable but are not biodegradable, though they are recyclable in some specialized programs.
The choice between them often comes down to longevity and convenience. While beeswax wraps have an aesthetic appeal, their lifespan is limited. In contrast, silicone lids are a workhorse. In fact, durability testing shows that beeswax wraps last about one year with proper care, while high-quality silicone lids can last for five years or more. This difference has a major impact on the long-term cost and effort required.
For a busy parent, the “best” tool is the one that gets used. A detailed cost analysis reveals the practical winner for most family kitchens.
| Factor | Beeswax Wraps | Silicone Lids |
|---|---|---|
| Initial Cost (set of 3) | $15-25 | $20-35 |
| Lifespan | 8-12 months | 5+ years |
| Annual Replacement Cost | $15-25 | $4-7 |
| Weekly Maintenance Time | 15 min (hand wash, air dry, re-wax) | 2 min (dishwasher safe) |
| Kid-Friendly (6-year-old test) | Difficult – needs warming with hands | Easy – stretch and snap |
| Best Use Case | Cheese, sandwiches, produce | Bowls, leftovers, liquids |
As this in-depth comparison of food storage options highlights, silicone lids are often the more practical choice for families due to their durability and dishwasher-safe convenience. Beeswax wraps still have a place for items like bread or cheese, but for covering bowls of leftovers—a common task in a family kitchen—silicone lids are the clear efficiency winner.
The Mason Jar Trap: Buying New Containers Instead of Using What You Have
One of the biggest misconceptions about starting a zero-waste kitchen is that you need to go out and buy a whole new set of beautiful, matching containers. This is “The Mason Jar Trap”—the belief that a sustainable kitchen must look like a Pinterest board. This pressure to achieve a certain aesthetic often leads to more consumption, not less.
A mismatched but functional system of reused containers is the true goal of zero-waste. The pressure for an Instagram-perfect pantry is actually creating more waste.
– Bea Johnson, Zero Waste Home
The most zero-waste container is the one you already own. Before you buy anything, take stock of what’s already in your cupboards. Empty pasta sauce jars, takeout containers that are still in good shape, and even old jam jars can be repurposed for storing bulk goods, leftovers, or prepped ingredients. A pantry full of reused, mismatched jars is a sign of true resourcefulness.
The key is to create an organized system from the chaos. A “container audit” is a simple, 30-minute task that can completely reset your perspective and prevent unnecessary purchases. It’s a foundational step in building an efficient kitchen system.
Your 30-Minute Container Audit Action Plan
- Gather & Empty: Empty one kitchen cabinet completely. Gather ALL food storage containers from around your home, including empty store-bought jars, takeout containers, and tins.
- Sort & Match: Sort containers by size and function (e.g., large for grains, medium for leftovers, small for spices). Match all lids to their bases and recycle or discard any broken or orphaned pieces.
- Establish a Home: Put the sorted, functional containers back into the clean cabinet. If you have a lot of glass jars, consider removing the labels for a cleaner look.
- Test the System: Commit to using only these containers for one full month. Make a note of any genuine gaps in your system where a specific type of container is repeatedly needed.
- Purchase with Purpose: Only after the one-month test should you consider buying a new container, and only to fill a proven, functional need—not an aesthetic want.
This process, inspired by hacks from zero-waste families, shifts the focus from buying to using. It reveals the abundance you already possess and builds a system that is functional for your real life, not an idealized one.
When to Tackle the Bathroom: Why You Should Start With the Kitchen First?
When you decide to reduce household waste, it’s tempting to try to overhaul everything at once—the kitchen, the bathroom, the laundry room. This approach is a recipe for burnout. A more strategic and sustainable method is to focus your energy where it will have the biggest impact. For almost every family, that starting point is the kitchen.
Why? Because the kitchen is the epicenter of household waste. From food scraps and packaging to disposable paper products, the volume of trash generated here far outweighs other areas of the home. In fact, research shows that a staggering 43% of household waste originates in the kitchen. By tackling the kitchen first, you are addressing the largest part of the problem and will see the most significant reduction in your overall waste.
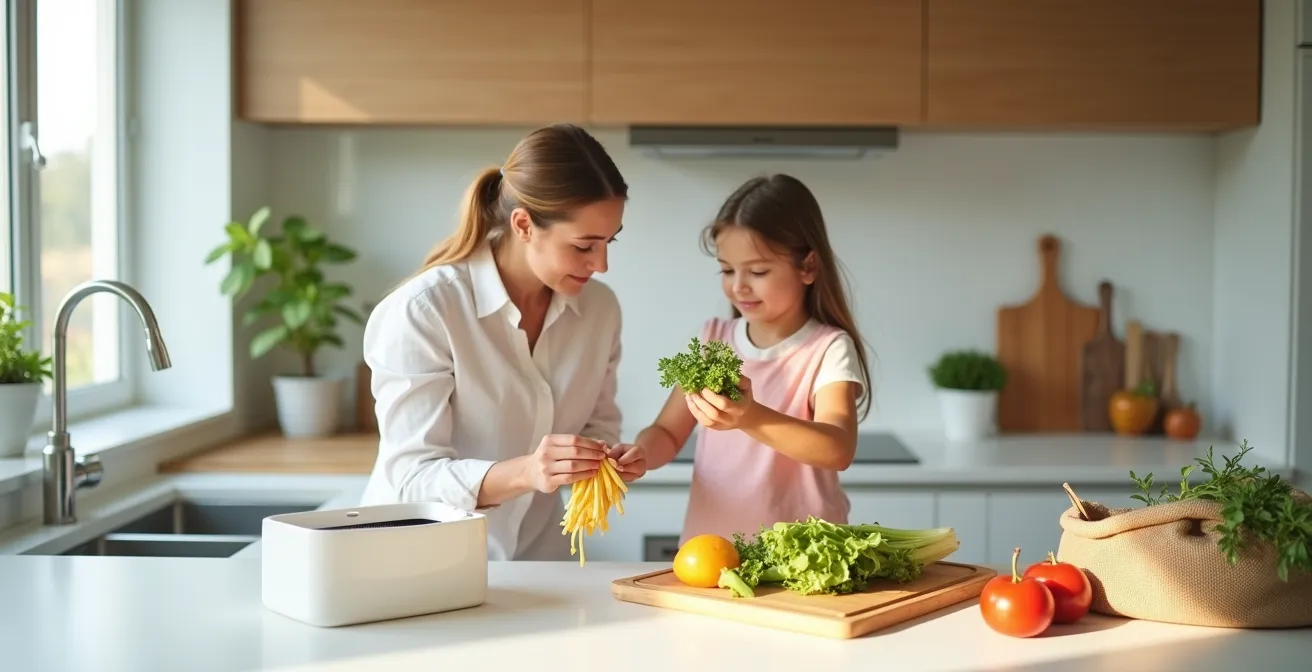
As this image shows, the kitchen also offers the best opportunities for teaching moments. Involving kids in sorting compost, washing vegetables, or packing their own lunches makes them active participants in the family’s sustainability efforts. These are tangible, everyday activities that connect them to where their food comes from and where their waste goes.
Starting in the kitchen builds momentum. When you see your main trash can becoming significantly less full each week, it provides powerful motivation to continue. The skills and systems you develop here—like meal planning, using reusables, and mindful purchasing—are directly transferable to other areas, like the bathroom, when you’re ready to tackle them later. Trying to switch to shampoo bars, bamboo toothbrushes, and reusable cotton rounds at the same time you’re figuring out food storage is simply too much at once.
How to Calculate Unit Price Correctly to Avoid “Bulk Illusion” Deals?
The advice to “buy in bulk” is one of the most common zero-waste tips, but for families, it can be a financial trap. The “bulk illusion” is the belief that a larger package is always cheaper. This is often true at the shelf, but it ignores the true cost, which must account for potential waste. If you don’t use it all before it spoils, the cheaper item can quickly become the more expensive one.
The key is to perform a quick mental calculation that goes beyond the sticker price. Instead of just looking at the price per pound or per ounce, you need to factor in your family’s actual consumption rate. Ask yourself: “Will we realistically eat all of this before it goes bad?” For perishable items like produce, dairy, or even some grains that can attract pests, honesty is critical.
A simple analysis of a common grocery purchase illustrates this perfectly. It shows how the “better deal” can end up costing you more.
Case Study: The True Cost of a Bulk Potato Purchase
Imagine a family choosing between a 10lb bag of potatoes for $3.00 ($0.30/lb) and a 3lb bag for $1.50 ($0.50/lb). The larger bag seems 40% cheaper per pound. However, if the family only uses 5lbs before the rest sprout and have to be thrown away, they’ve paid $3.00 for 5lbs of usable potatoes. Their true cost is now $0.60 per pound. In this scenario, the smaller, seemingly more expensive bag was actually 17% cheaper. This is a common occurrence, as ReFED data shows that 17% of purchased root vegetables are wasted in the average household.
To calculate the true unit price, simply divide the total cost by the amount you actually use, not the amount you buy. This mindset shift is crucial for making smart purchasing decisions that save money and reduce waste. It’s better to buy a smaller amount you will completely finish than a larger amount that contributes to food waste.
The “Batching” Method: Why Doing Laundry Once a Week Is Faster Than Daily Loads?
The concept of “batching” is well-known in productivity circles: grouping similar tasks together to complete them more efficiently. While the title mentions laundry, this efficiency system is a game-changer when applied to the kitchen. Instead of dealing with food prep and cleanup in small, scattered bursts every day, you can batch these tasks into one or two focused sessions per week, saving an incredible amount of time and mental energy.
For a busy parent, the daily grind of chopping vegetables, packing lunches, and cleaning up can feel relentless. Batching turns this daily chaos into a predictable system. It reduces decision fatigue because the prep work is already done. When it’s time to make dinner, the veggies are already chopped. When it’s time to pack lunches, the snacks are already portioned.
Case Study: The Weekly Waste Processing Batch System
One family documented on Sustainable Jungle, a resource for eco-friendly living, found that batching all their waste-related kitchen tasks into a single 30-minute Sunday session was revolutionary. This included washing all reusable bags and wraps at once, taking out the week’s compost, cleaning and reorganizing food storage containers for the week ahead, and prepping lunch supplies. This system reduced their daily kitchen cleanup time from 45 minutes to just 15 minutes. Even more importantly, they reported a significant reduction in mental load, as the “what to do with this?” question was handled in one go.
Applying this system to your kitchen can look something like this:
- Sunday Veggie Prep: Dedicate 45 minutes on a Sunday to wash and chop all the vegetables for the week’s planned meals. Store them in airtight glass containers.
- Grain Cook-off: Cook a large batch of a versatile grain like rice or quinoa. Refrigerate it in portions for quick side dishes or lunch bowl bases.
- Snack Station Assembly: Portion out five days’ worth of non-perishable lunchbox snacks (like nuts, crackers, or dried fruit) into small reusable containers.
- Dry Mix Prep: For things like pancakes or muffins, mix the dry ingredients in a large jar. In the morning, you just need to add the wet ingredients.
This approach, also championed by organizations like Zero Waste Kitchen, transforms your week. It requires a small upfront investment of time but pays you back every single day with less stress and more free time.
Key Takeaways
- A zero-waste kitchen is not about perfection; it’s about creating practical systems that save time, money, and reduce stress for your family.
- Start with the highest-impact area—the kitchen—where over 40% of household waste is generated.
- Focus on using what you already have before buying new, and calculate the “true cost” of purchases to account for potential waste.
Why Repairing Electronics Is Cheaper Than Replacing Them in a Circular Economy?
Our zero-waste efforts in the kitchen shouldn’t stop at food and packaging. Kitchen appliances—blenders, toasters, mixers, coffee makers—are a significant source of waste. We live in a “throwaway culture” where it often feels easier and sometimes cheaper to replace a broken small appliance than to fix it. However, this is rarely the case and directly contradicts the principles of a circular economy, where the goal is to keep resources in use for as long as possible.
Before automatically shopping for a replacement, take a moment to diagnose the problem. Often, the issue is simple: a frayed cord, a blown fuse, or a worn-out gear. Thanks to online video tutorials and websites dedicated to appliance repair, finding instructions for a fix is easier than ever. Many manufacturers also sell replacement parts directly to consumers.
The financial argument for repair is surprisingly strong. While a new, mid-range blender might cost over a hundred dollars, a replacement part might only be a fraction of that. In most cases, even paying for a professional repair is more economical than buying new. For example, consumer data shows that the average repair cost for a small kitchen appliance is just $45, compared to a replacement cost that can easily exceed $125. Choosing to repair saves money and prevents a bulky item from ending up in a landfill.
This mindset is the final piece of an efficient, low-waste kitchen system. It’s about valuing our belongings and the resources used to create them. Teaching kids that we fix things when they break, rather than immediately replacing them, is a powerful life lesson that extends far beyond the kitchen.
Your journey to a lower-waste kitchen starts with the next small choice you make. Whether it’s saving your vegetable scraps for broth or deciding to fix that wobbly toaster, every action builds momentum. Start today by choosing one system from this guide to implement in your home.